An effect doesn’t have to sound the same for the whole song. With automation, a value changes by itself while your take plays: reverb that grows at the end of a line, an echo that appears on the last word, a filter that opens little by little. You draw it once with your finger and VRaptor repeats it on every playback and in everything you export.
Automation lives on the Pro screen. If you haven’t met it yet, start with The Pro screen and Effects.
Curves belong to a take
Each curve belongs to one take, not to the song. That way the voice in the chorus can move differently from the voice in the verse.
- The curve travels with the take: if you move, copy or paste the take, the curve goes with it.
- If you trim the take, the curve stays attached to the voice: whatever was over the trimmed part isn’t lost, it just stops playing.
- Each take shows its curves on the timeline, above its waveform, in the colour of their effect. There you can only see them; to change them, open the editor.
Styles move too: many come with their own motion (an echo that jumps in at the end of each line, a choir that answers every two bars…). That motion is placed on the take as ordinary curves, so you’ll see it in the editor and can change it like any curve of your own. A few styles also move things that have no control in any panel; those curves can’t be edited.
Opening the curve editor
There are two ways:
- From an effect’s panel. Open an effect from the grid. Next to the name of each control that can be automated there’s a small curve button (a line with dots). Tap it and the editor opens on that control.
- From the take’s bar. Tap a take on the timeline: its toolbar appears above it (trim, automate, copy, delete). Tap the curve icon. If an effect’s panel is open, the editor opens on that effect; if not, on the first control that already has a curve (or on the tuner).
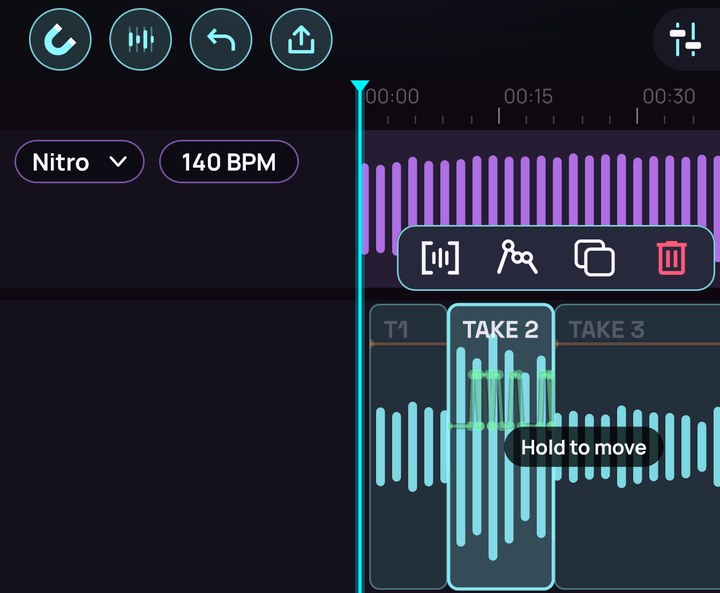
The editor works on the take shown in the take stepper. If there isn’t one, VRaptor tells you: Record a take first or Select a take first (“Curves belong to a take…”). If the playhead wasn’t inside that take, it jumps to the take’s start.
The editor slides up from the bottom as far as the timeline. To close it, swipe down from its top edge, or use your phone’s back gesture.
The effect’s panel stays on top
While you edit a curve, the effects grid stays in view: the effect you’re editing lights up and the others dim.
- If the effect’s panel was open, it stays above the editor (it shortens to where the editor begins) and follows the editor: if you switch to another effect, the panel switches with it.
- Tap another effect in the grid (or the tuner card) to bring its curves into the editor. If that effect has nothing to automate, the phone vibrates and nothing changes.
- The mixer and its button are still within reach, so you can balance voice and beat without closing the editor.
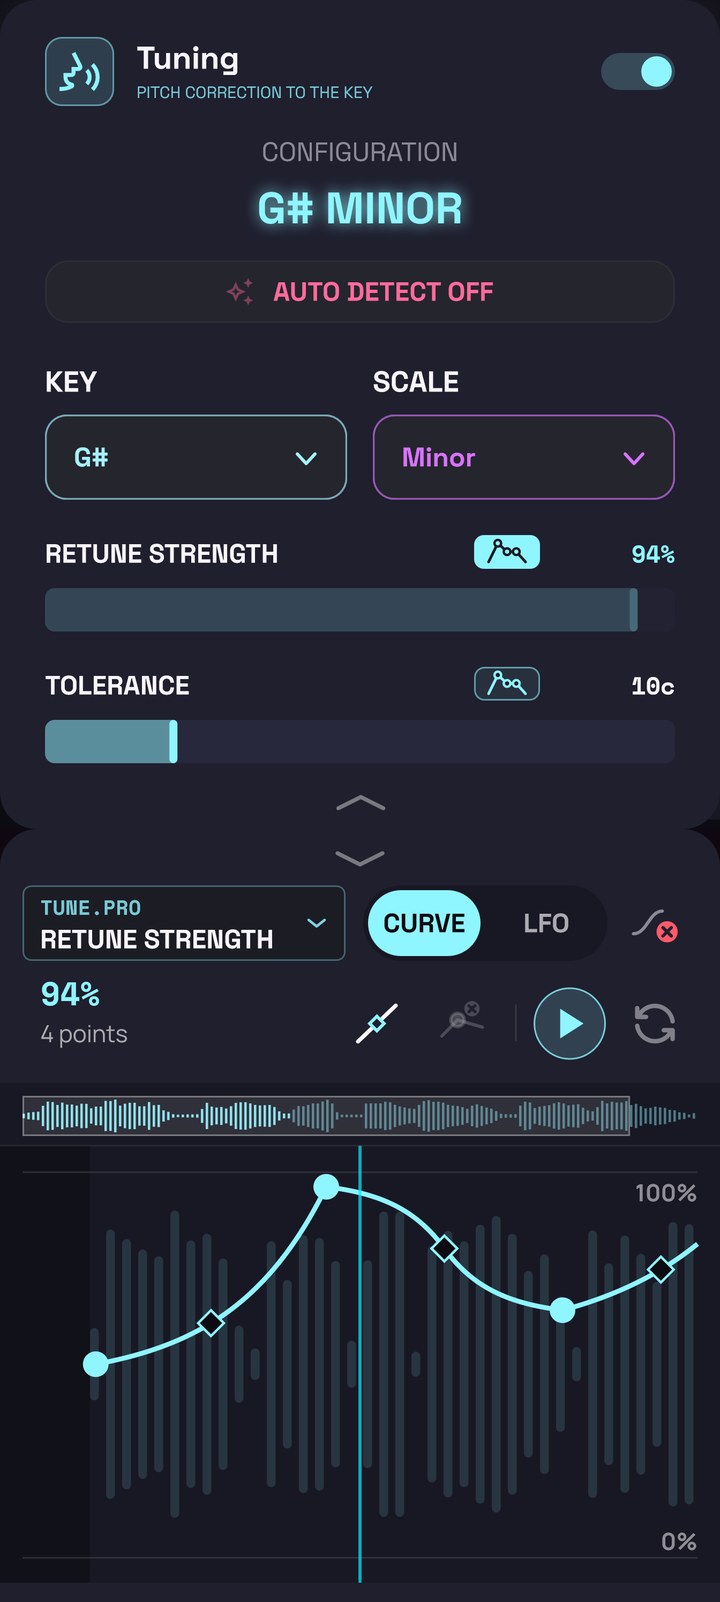
Choosing the parameter
At the top of the editor you’ll see the name of the control you’re editing, in its effect’s colour. Tap it to see a list of the other controls of the same effect and pick another one. To go to a different effect, tap its tile in the grid.
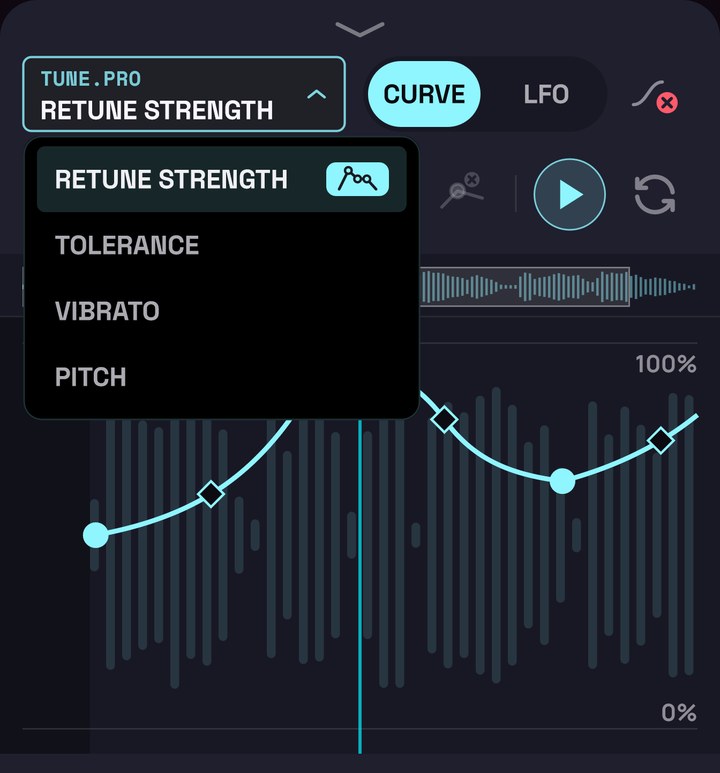
Below it, in large type, is the value: the curve’s value at the playhead, or the value of the point you’re touching or dragging, with its position in the song. Your finger never covers it.
CURVE or LFO
In the header you choose what moves the control:
- CURVE: points you place yourself. For specific changes: raising the reverb in the last bar, cutting the echo off sharply.
- LFO: a wave that rises and falls on its own, locked to the beat’s tempo. For continuous movement: a tremolo on the Volume, a filter that breathes.
You can switch between them whenever you like: what you had in the other one is kept for when you come back.
Next to them is the clear curve button (a crossed-out curve): it removes the curve or LFO from that control in one go. If you change your mind, Undo.
Drawing a curve
The graph shows the take around the playhead, which always stays in the centre, with your voice faintly behind the curve.
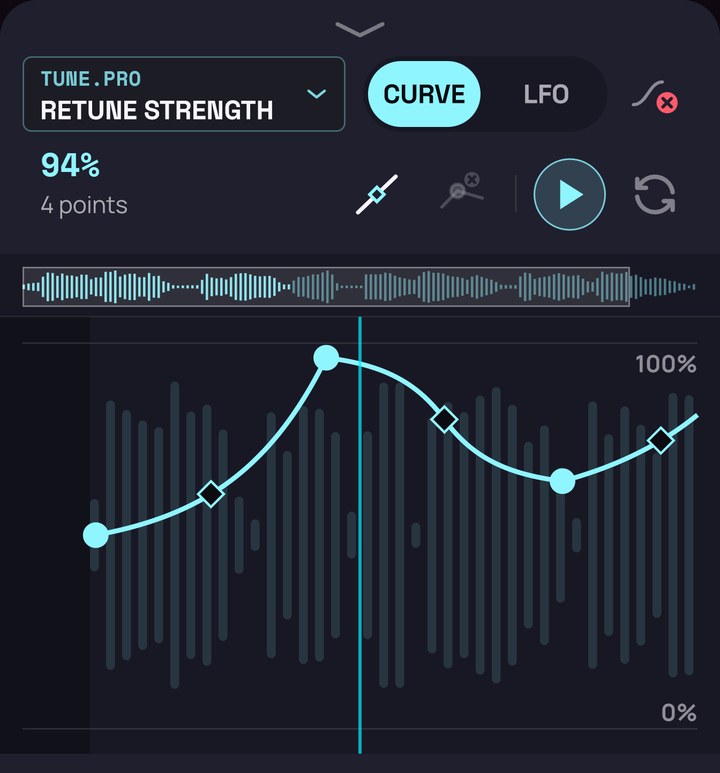
- Add a point: double-tap. While there are none, the editor says No curve yet · Double-tap to add a point.
- Select a point: tap it. A tap on an empty spot deselects it.
- Move a point: drag it.
- Delete a point: select it and tap the delete button (a dot with a small red cross).
Before the take starts and after it ends, the graph is shaded: you can’t add anything there.
The diamond on each segment
Between two points there’s a small diamond: it’s the segment’s bend. Drag it and the segment passes through it in two straight lines. In the middle, the segment is a straight line. If you drag it to a corner, the segment becomes a step: it holds its value and jumps suddenly at the next point (or jumps at the start and then holds). When it’s a step, Step appears next to the value.
SHAPE: straight or S
The first button next to the value draws the segment’s shape:
- With a point selected, it switches the segment leaving that point from straight to an S curve (starts and ends smoothly) and back.
- With no point selected, it chooses the shape of the next point you add.
Snapping to the beat
The magnet button, above the timeline, is the same one as in the studio: when it’s on, points land on sixteenth notes (1/16 of a bar) of the beat. It only works if the beat has a tempo.
Moving around the take
- Drag an empty spot on the graph to move through the take. If it was playing, it pauses while you drag and carries on when you let go.
- Pinch to zoom in or out.
- Above the graph there’s an overview of the whole take, with a box over the part you can see. Tap or drag there to move the playhead to that point.
Play and loop
To the right of the value are play and loop:
- Play starts from the playhead if it’s inside the take; if not, from the take’s start. While it plays, the take scrolls under the centre line.
- Loop, when on, jumps back to the start of the take when it reaches the end, over and over: ideal for fine-tuning a curve while you listen. It’s the same take mode as the transport’s loop button. When it’s off, playback stops at the end of the take.
The LFO
With LFO, the graph shows the wave and two lines: the top and bottom lines mark the range of values the control moves between.
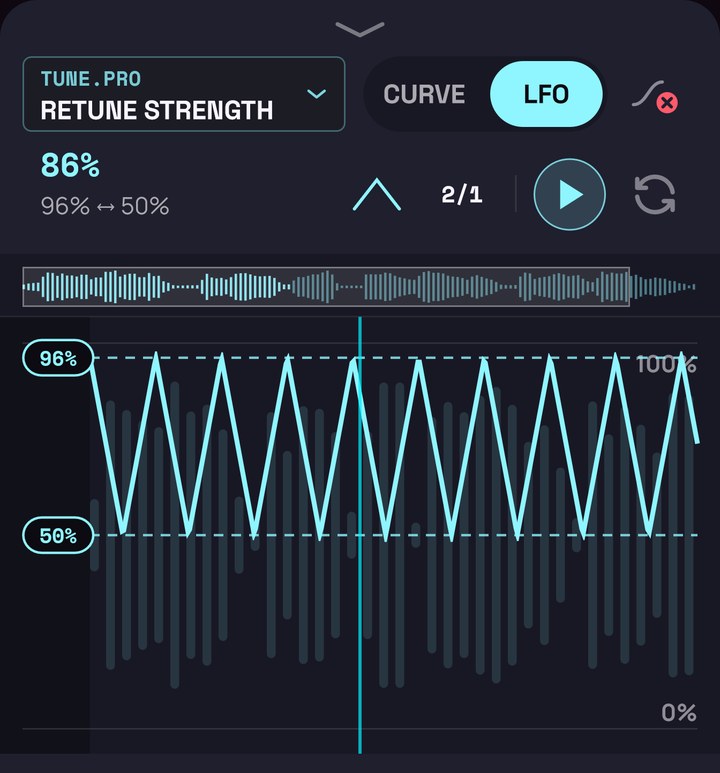
- Drag a line up or down to change that limit (the editor shows Top or Bottom and its value).
- Drag the wave sideways to shift its phase (in sixteenths of a cycle; the editor shows the degrees), or up and down to move both lines at once.
- If you put the top line below the bottom one, the wave is inverted.
Its two buttons open the options above the graph:
| Button | Options |
|---|---|
| Wave | Sine, Triangle, Ramp up, Ramp down, Square, Random |
| RATE | 1/16, 1/8, 1/8., 1/4, 1/2, 1 bar, 2 bars, 4 bars |
The rate is how long one cycle lasts, measured in the beat’s tempo: the LFO is always in time with the song. When you switch it on, it starts as a 1/4 sine swinging around the control’s current value, over half of its range.
How an automated control looks
In the effect’s panel, a control that has a curve on the take you’re editing changes:
- Its curve button lights up, filled with the effect’s colour.
- The value and the bar follow the curve: while the song plays, you see the value that’s sounding at that moment move.
- The bar is locked: the curve sets the value, not your finger. To change it, tap the curve button and edit the curve, or clear it.

Undo
Every change in the editor is saved immediately, and each one can be undone with the studio’s Undo button, which stays in view above the editor. It also brings back a curve you cleared.
Watch out: if you give that take another style, its curves are replaced by the new style’s motion. If that’s not what you wanted, Undo brings them back.
Next
→ 10. Custom presets: save the sound you’ve built in Pro and use it in any song.