VRaptor does a lot for your voice after you record it, but there are three things only you can do: record at a good level, in a quiet place and in time with the beat. This page explains how.
With or without headphones
With headphones (best). The microphone only hears your voice, so the take comes out clean. You can also hear yourself with the effects while you sing and know how it’s going to sound (see “Hearing yourself while you sing”, below).
Without headphones. The beat comes out of the speaker and the microphone hears it too. VRaptor does two things:
- You don’t hear yourself while you sing. Your voice through the speaker would go back into the mic and feed back. You only hear the beat.
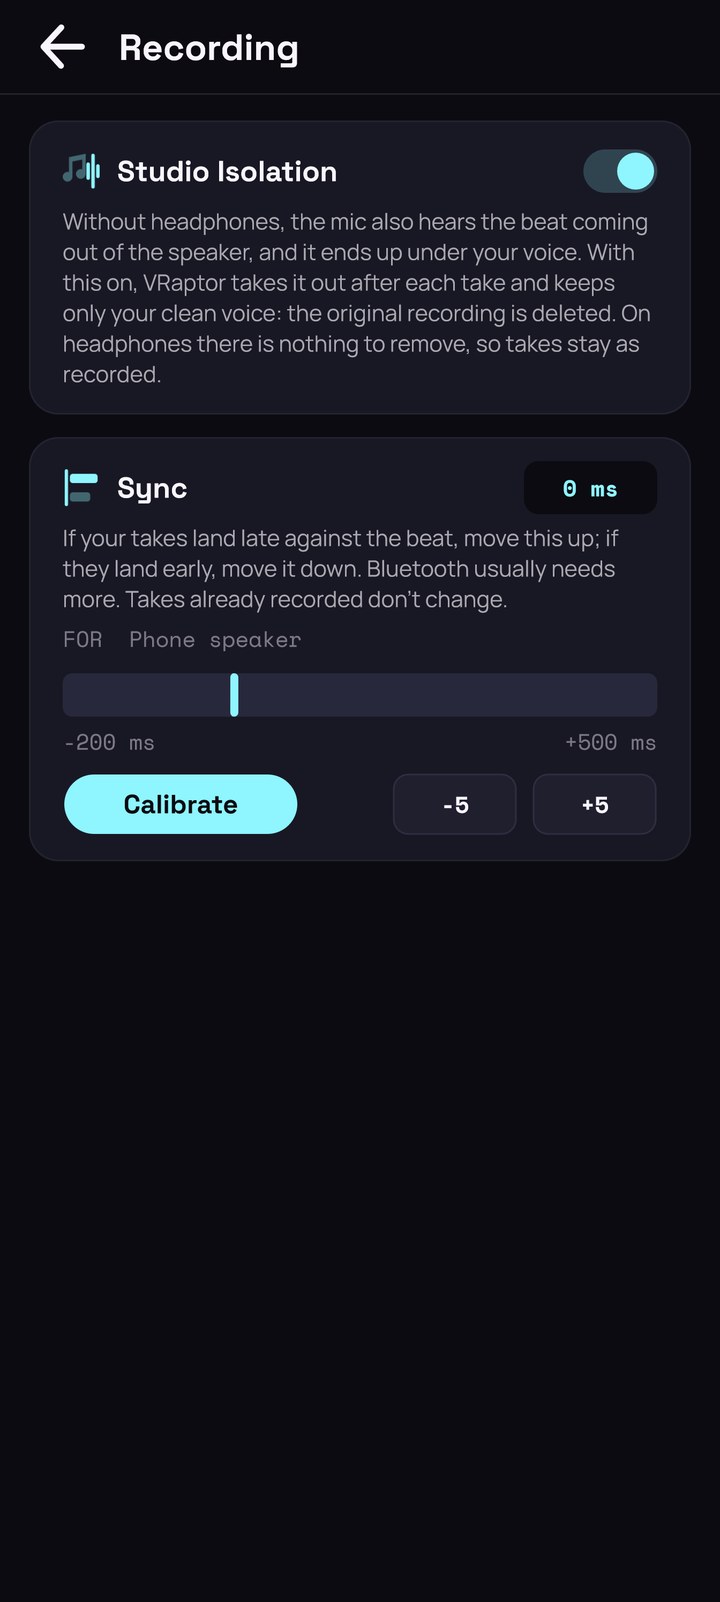
- It removes the beat from your take after recording. That’s the job of Studio Isolation (Settings → Recording), on by default. When the take ends, VRaptor cleans it in a few seconds and only your voice is left.
To make it work well without headphones:
- Set the volume to a comfortable level, not to the maximum: the louder the beat plays through the speaker, the more there is to remove.
- Don’t move the phone around much while you sing.
- Cymbals and hi-hats are the hardest to remove completely. If you notice some of them in a take, headphones will fix it.
- The AI cleanup comes in the sound pack. If you haven’t downloaded it yet, VRaptor cleans the take in a simpler way and cleans it again with the AI once you download it.
When Studio Isolation cleans a take, the original recording is deleted and only the clean one is kept. With headphones there’s nothing to remove, so the take stays as you recorded it.
Wired or Bluetooth? Wired whenever you can. Bluetooth delays the sound (sometimes a lot), and although VRaptor makes up for it, hearing yourself late while you sing is uncomfortable. If you use Bluetooth, calibrate the sync (below).
Hearing yourself while you sing
By default, VRaptor doesn’t send your voice back to your headphones: you hear the beat and sing. If you want to hear yourself with the style on while you record:
- Switch to Pro with the Simple | Pro switch.
- Open the mixer with the tab on the right, above the timeline.
- On the VOICE strip, turn on the headphones button.
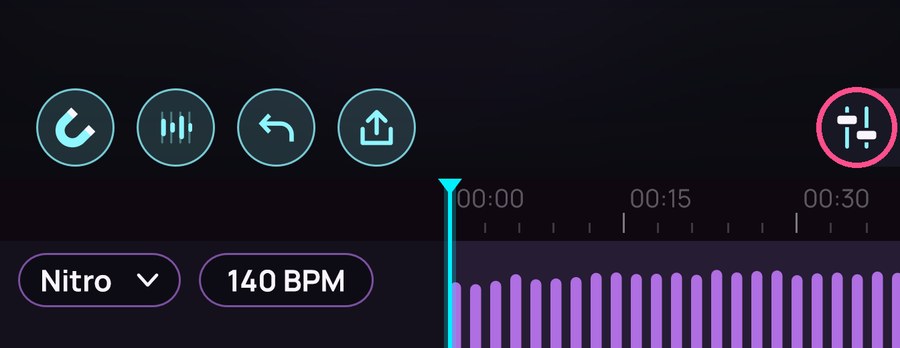
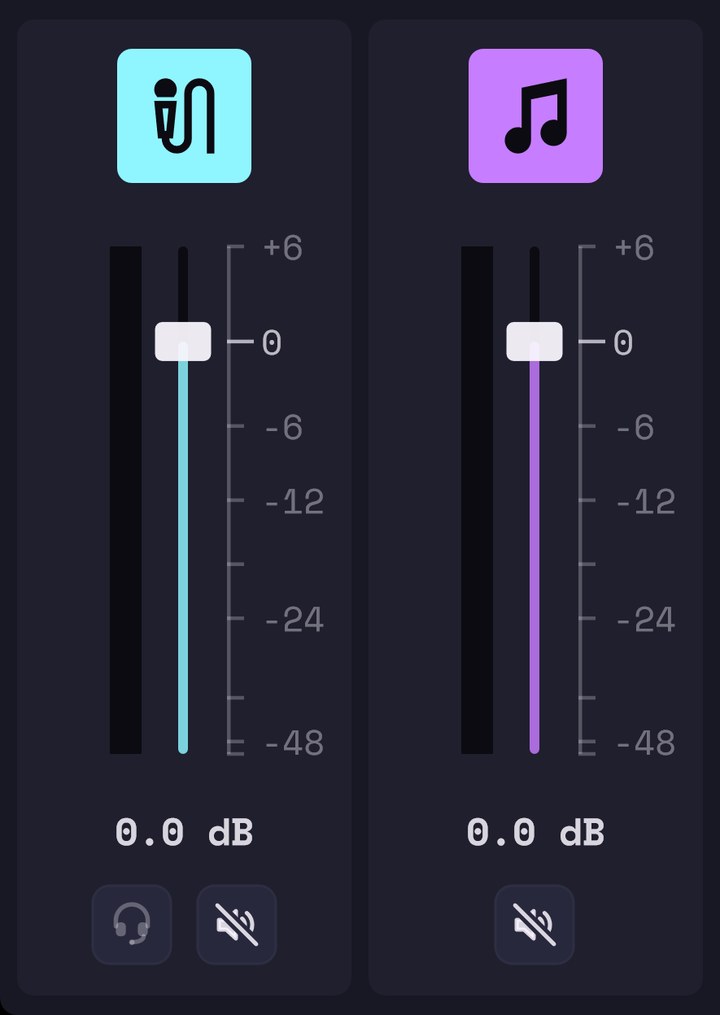
It stays on for next time, in Simple too. It only works with headphones plugged in: without them you’ll see Monitoring needs headphones.
Level: the ring round the record button
On phones you can’t turn the microphone’s level up or down: the level of your take depends on how close you are.
Around the record button there’s a ring. It fills with the volume of your voice as it reaches the microphone, before any effect, and the marked zone is the good one. While you sing (or before, to test):
- It barely fills: move closer. If you record too quietly, turning it up also turns up the noise.
- It reaches the end: move back a little. If you overdo it, your voice distorts, and no effect can fix that.
- It moves within the marked zone: perfect.
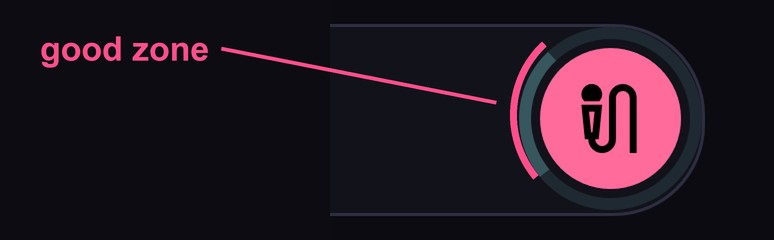
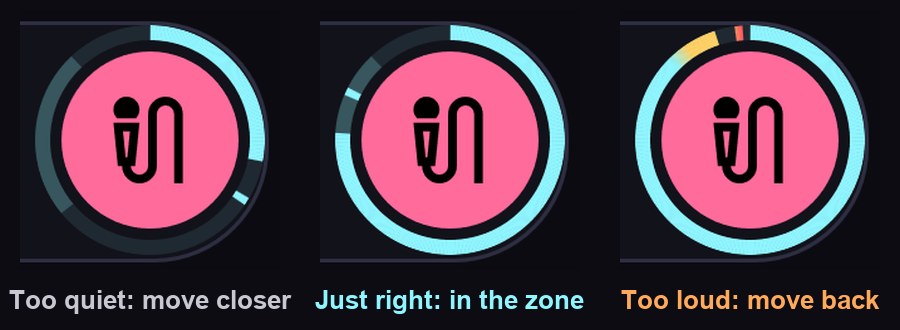
A hand’s width (about 15–20 cm, 6–8 in) between your mouth and the microphone is usually a good starting point. The microphone is usually at the bottom of the phone: don’t cover it with your hand.
Afterwards you can balance the voice and the beat in the mixer in Pro mode, but the level you recorded at doesn’t change. VRaptor also evens out the level of each take so none ends up much quieter than another.
Where to record
- A small room with stuff in it (curtains, clothes, a sofa) sounds better than a big, empty one. A wardrobe full of clothes makes a surprisingly good studio.
- Away from fans, fridges and traffic.
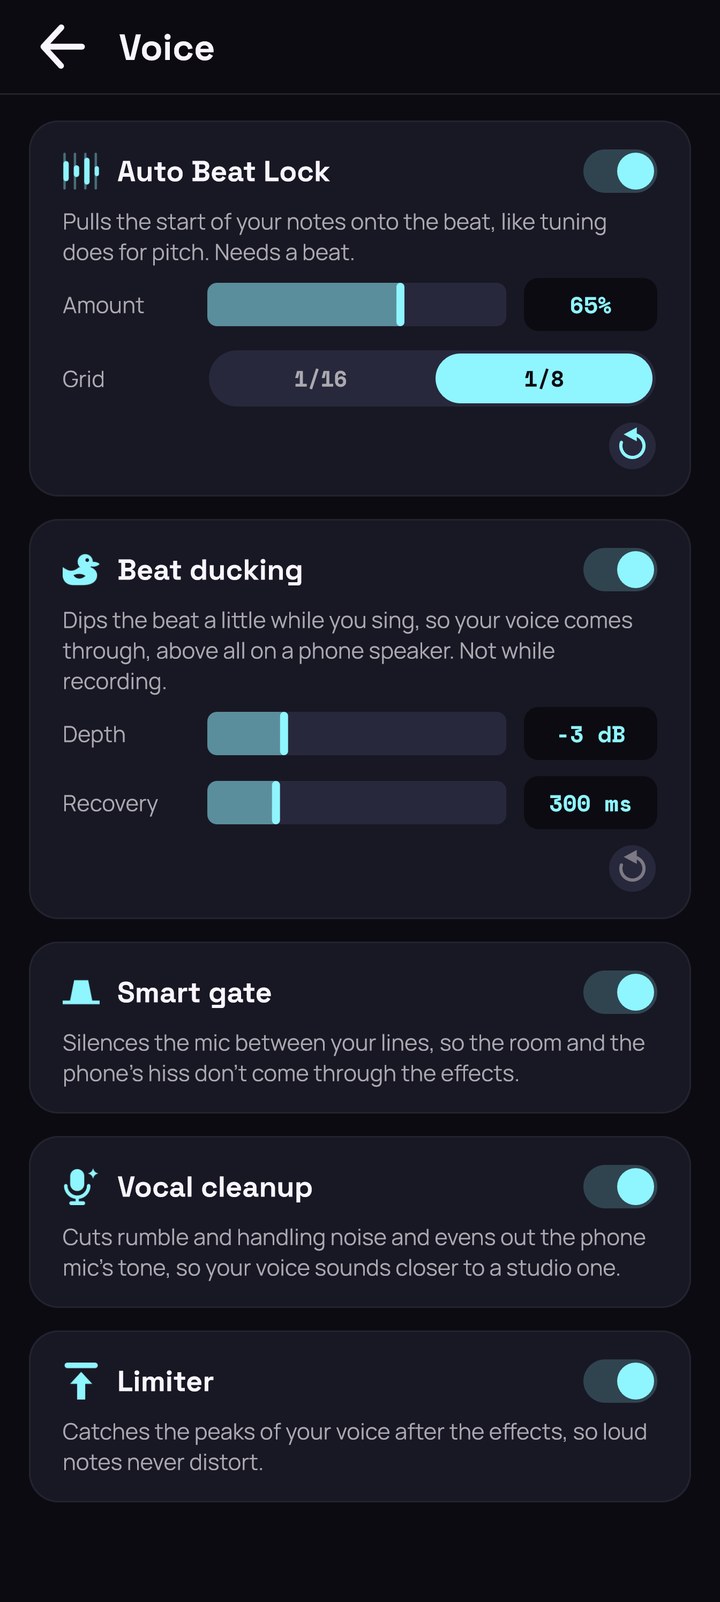
- VRaptor removes rumble and handling noise and evens out the tone of the phone’s mic (Vocal cleanup, in Settings → Voice), and silences the mic between your lines (Smart gate). They help a lot, but the better the take, the better the result.
Takes: record, redo and undo

- Every time you record, a take is created. Top right, the take stepper tells you which one you’re on, for example TAKE 3 2/3 (take number 3, which is the second of three in the song). With no take under the playhead it says NO TAKE.
- Go to another take: tap the stepper’s arrows. With the song stopped, the playhead jumps to the start of that take; if it’s playing, it keeps playing from there. You can also tap or drag the waveform.
- Redo a part: move the playhead to where you want to start and record. The new part plays over what was there in that section; the rest of the song isn’t touched.
- Carry on after a take: right after listening to it, if you record, the new take starts where the previous one ends.
- With the song stopped, recording starts at the playhead. If you record while the song is playing, VRaptor starts a bar earlier so you come in on time. You hear that part, but it isn’t recorded.
- Delete a take: with the song stopped, tap the × next to its name in the take stepper.
- Undo undoes the last recording or change, including a deletion.
Each take keeps its own style. All about takes in Takes.
In time with the beat
Sync
Between the phone playing the beat and you hearing it, and between you singing and the mic recording it, a few milliseconds go by. VRaptor makes up for them, but every phone and every audio output is different. If your takes sound a little late or a little early against the beat, calibrate the sync:
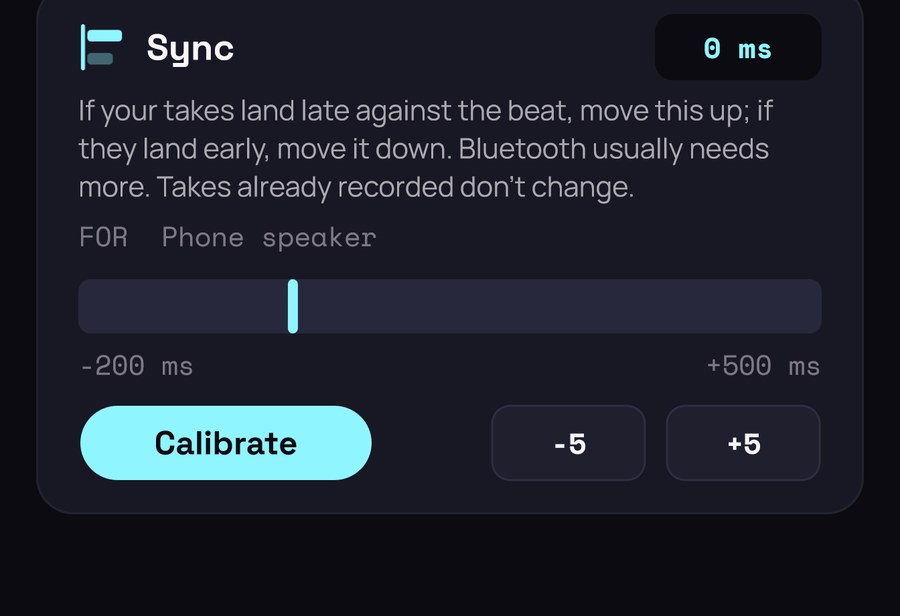
- Go to Settings → Recording → Sync.
- Connect the output you’re going to use. VRaptor keeps a separate setting for each one: Phone speaker, Wired headphones, USB headphones and Bluetooth headphones.
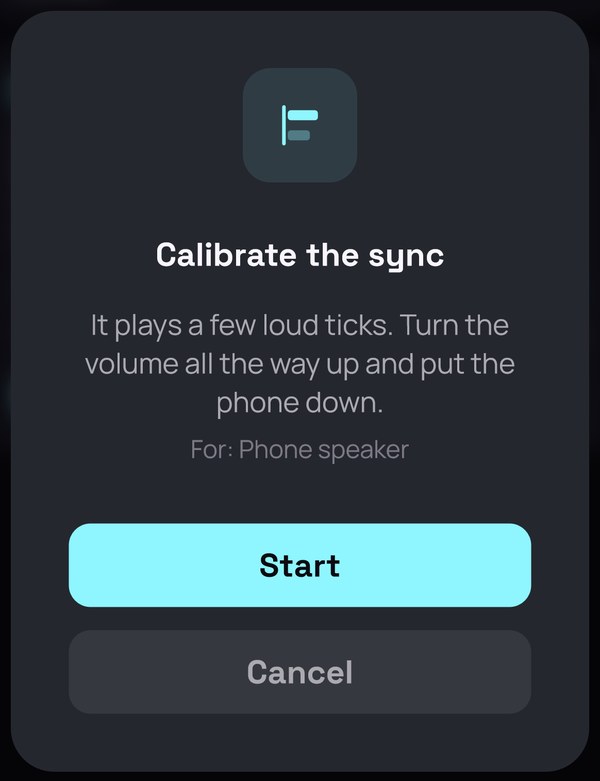
- Tap Calibrate and then Start:
- With headphones: take them off first, because it plays a few loud ticks. Then turn the volume all the way up and hold an earbud against the phone’s microphone.
- With the speaker: turn the volume all the way up and put the phone down.
You can also set it by hand: if your takes land late, move the value up; if they land early, move it down. Bluetooth usually needs quite a bit more. Takes you’ve already recorded don’t change; the setting applies to the next ones.
If it says “Couldn’t hear the ticks”, with the headphones off, make sure the volume is all the way up and hold an earbud right on the microphone. If it says there’s too much noise, try somewhere quieter.
Auto Beat Lock
On top of that, VRaptor pulls the start of your notes onto the beat, the way tuning does for pitch. It’s on by default and you can adjust it in Settings → Voice → Auto Beat Lock:

- Amount: how close your notes move to the beat. At the maximum, everything lands right on the beat; lower, more of your own way of singing comes through.
- Grid: which divisions of the bar they snap to: 1/16 (sixteenth notes, the default) or 1/8 (eighth notes).
It needs a beat: without a beat there’s no timing to snap to.
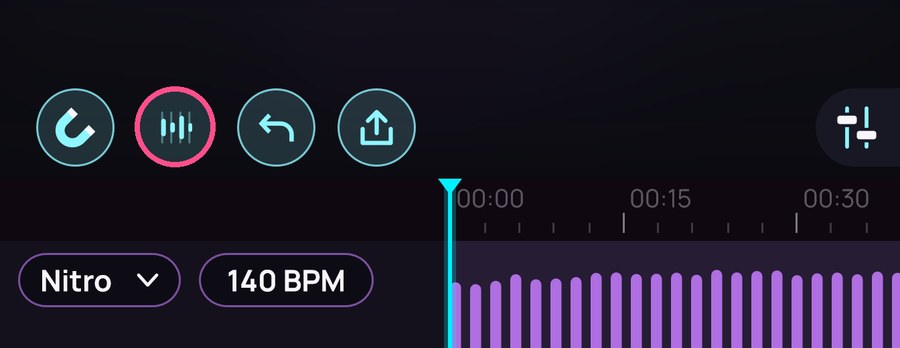
Beat Lock on every take, whenever you want (Pro). Auto Beat Lock adjusts each take without touching the recording. If you’d rather fix them for good on the beat, tap the Beat Lock button in Pro (bars over lines, next to the magnet): it locks every take in the song at once, with the amount and grid from Settings → Voice, even with Auto Beat Lock off. It asks first, and a single Undo brings them all back. More in Takes.
If something goes wrong
“VRaptor needs the microphone”: you denied the microphone permission. Tap Open settings and allow it in your phone’s settings.
“Monitoring needs headphones”: that’s normal; without headphones VRaptor doesn’t let you hear yourself so it doesn’t feed back. Plug some in and you’ll hear yourself.
“Audio is breaking up”: the phone can’t keep up with so many effects. Remove or turn some off in Pro mode.
Your voice sounds quiet against the beat: turn the voice up in the mixer (Pro mode). VRaptor also dips the beat a little while you sing (Beat ducking, in Settings → Voice), above all so you can be heard on the phone’s speaker.