In five minutes you have a song: you pick a beat, sing over it, choose how you want your voice to sound and share it. This page walks you through it step by step. The first time you tap Start New Song, the app itself takes you through these same steps with a guided tour.
The Home screen
When you open VRaptor you see the Home screen.
- The first time it greets you with Welcome to the Studio and shows you the three steps: Pick a beat, Sing and Shape it. Tap Start New Song and the guided tour begins. Explore Library is greyed out because you don’t have any songs yet.
- After that it offers Continue Working on your last song (tap the card to open it or the play button to listen to it), Start New Song and Explore Library.
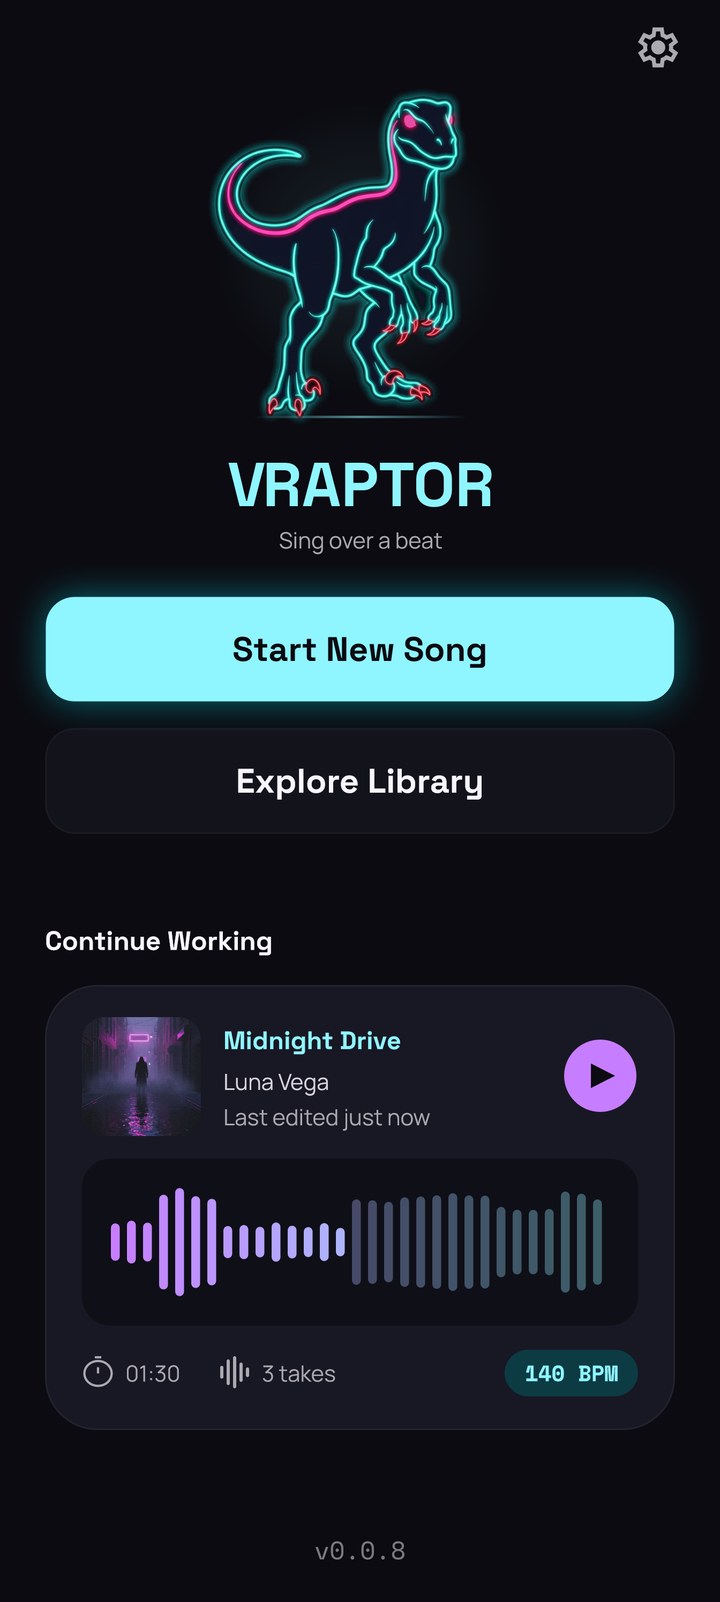
The Home screen only appears when you open the app. After that, when you leave the studio you go to the Library, where all your songs are; from there you create another one with the + button.
The guided tour
The tour lights up one control at a time, with a card telling you what to do and why: pick the beat, listen to it, choose where to start (by tapping the waveform), record, stop, listen to your take (it plays by itself, on a loop), change the sound, fine-tune it and make your first video. It moves on as you do each thing; on the steps where you can try things at your own pace, tap Next when you want to carry on. You can leave it whenever you like with Skip.
If you don’t have Premium, the tour never asks you to pay: the carousel only shows the free styles and the video is the free one (30 seconds, with the watermark). At the end you’ll see Song ready!: your song is already in your Library, and you can choose Record another take, Try Pro mode (it starts the Pro tour on your song) or Go to Library.
Want to do it again? It’s in Settings → Help → Take the tour. On the same page you’ll find the Pro tour, for when you want to go further.
Before you start: the beats
The first time you enter the studio, VRaptor offers to download every beat and its cover in one go. It downloads only once; Wi-Fi is best. Keep the app open until it finishes. If the download gets cut off, what’s already downloaded is kept: tap Try again and it picks up where it left off.
If you tap Not now, that’s fine: three beats come with the app (Nitro, Mojito and Confetti) and each of the others downloads when you tap it in the beat picker (see Step 1). The AI that cleans takes you record without headphones comes inside the app, so it works from your very first take.
Step 1 · Pick a beat
Tap Start New Song. The studio opens in Simple mode (or in Pro, if that’s the one you used last). The song has no beat yet: above the waveform you’ll see the Choose a beat chip. Tap it and the beat picker opens.
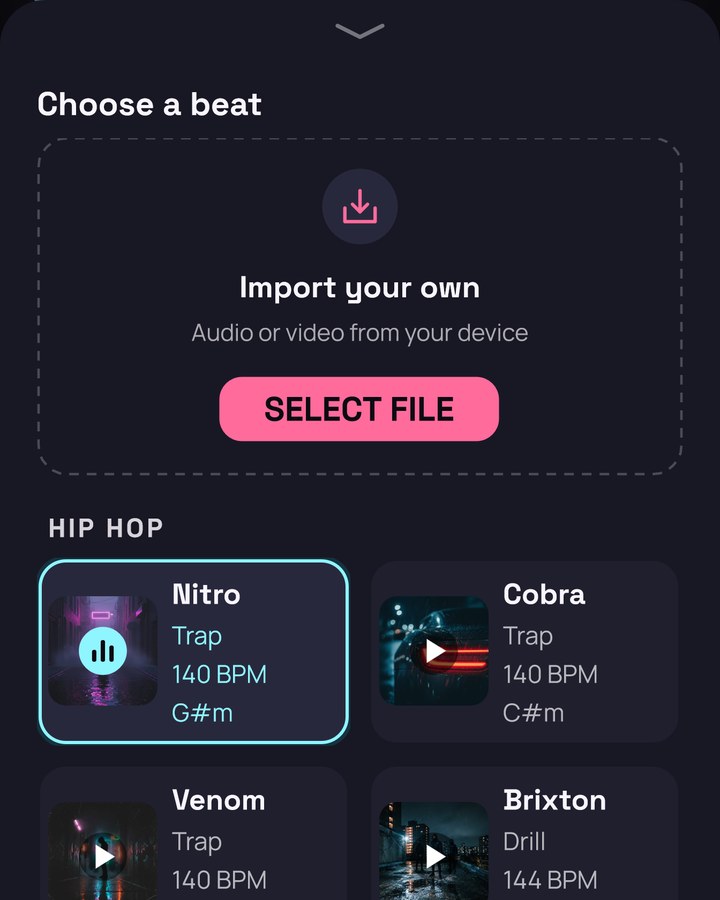
- Tap a beat’s cover to listen to it. Tap it again to stop it.
- Tap the rest of the card (its name, its style) to use it in your song. The picker closes and you’re back in the studio.
If you didn’t download every beat, the ones you don’t have yet carry a download arrow. Tap one and it downloads by itself (about 2 MB, a matter of seconds): a circle spins on its cover and, as soon as it arrives, it starts playing, just as when you tap the cover. If you like it, tap the card to use it. You only need a connection that first time; after that the beat stays on your phone.
Each beat shows its tempo (BPM) and its key. The key matters: VRaptor’s tuner tunes your voice to that key from the very first note.
Have your own beat? Right at the top is Import your own: choose an audio file or a video from your phone and VRaptor will use its sound. More in Beats and key.
You can change the beat whenever you like by tapping the chip with its name, above the waveform.
Step 2 · Sing
The first time, your phone will ask for permission to use the microphone: allow it, or VRaptor won’t be able to record you.
Put on headphones if you have them (wired is best) and tap the red microphone button, bottom right. The beat starts and VRaptor records. Sing. To finish, tap it again.
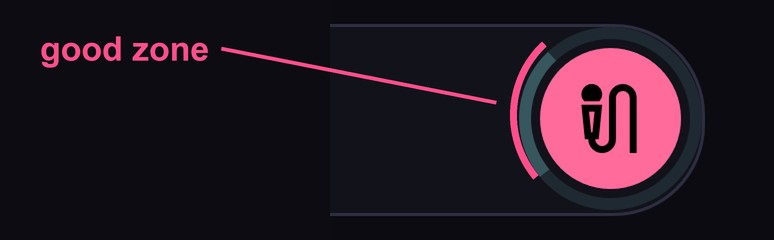
Around the button there’s a ring that fills with the volume of your voice. Try to keep it moving within the marked zone of the ring: if it barely fills, move closer to the microphone; if it reaches the end, move back a little.
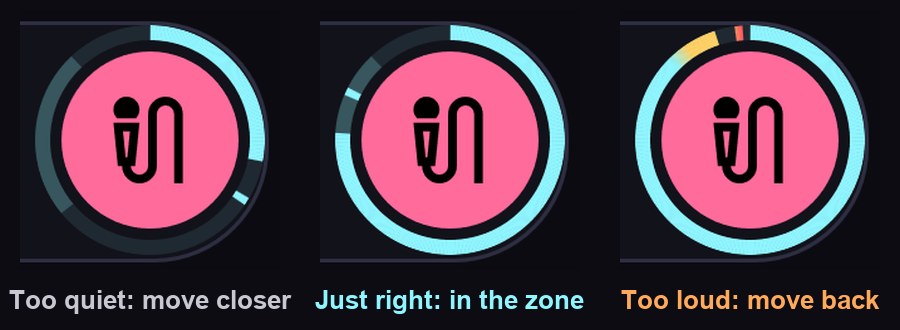
Without headphones you don’t hear yourself while you sing (your voice would come out of the speaker and feed back), but you can still record: VRaptor afterwards removes the beat that leaked into the microphone. With headphones you can hear yourself with the effects if you turn on monitoring in the mixer in Pro mode. All of this, in detail, in Recording.
When you stop, VRaptor works on your take: it removes noise and room echo, evens out the tone of the phone’s mic and pulls your notes onto the beat’s timing. Meanwhile the take pulses on the waveform; as soon as it’s ready, it plays once, from a second before it starts.
Didn’t like it? Tap Undo (the first round button above the waveform, on the left) and record again. If you only want to redo a part, tap the waveform at that point to move the playhead there and record: the new part plays over the old one in that section.
Top right, the take stepper tells you which take you’re on (for example, TAKE 2). Its arrows take you to the previous or the next take.
Step 3 · Shape it
Below the key is the style carousel. Swipe to change the sound of your voice: RAPTOR (hard tune, the classic), REGGAETON, BALLAD, CHOIR, ROBOT, MELODIC TRAP, FLAMENCO… Each card says in a few words how it sounds. You hear it straight away.
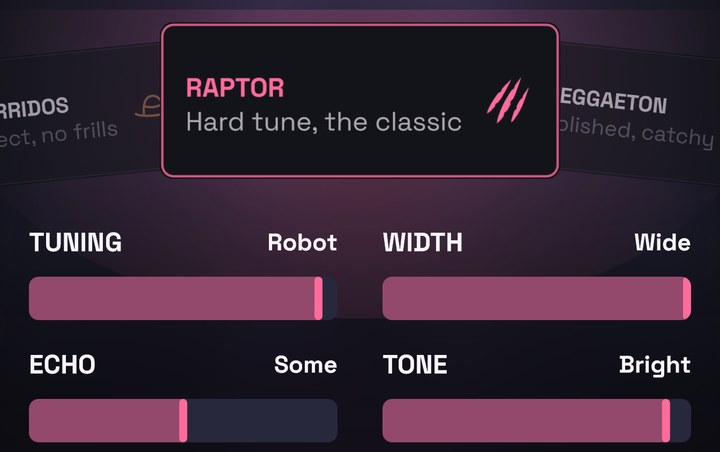
Below the carousel, each style has up to four controls. Drag them to adjust it. Their names say what they do:
| Control | From… to… |
|---|---|
| Tuning | Natural → Robot |
| Space | Dry → Huge |
| Echo | Off → Long |
| Choir | Solo → Crowd |
| Octave | Off → Loud |
| Tone | Dark → Bright |
| Grit | Clean → Dirty |
| Voice | Deep → Thin |
| Width | Narrow → Wide |
| Motion | Still → Wild |
Each take has its own style. The style and its controls apply to the take you’re on (the one the take stepper shows). Right after recording you’re on the new take, so whatever you choose goes to it. And the next take you record starts with the last style you chose.
Tap play to hear how it sounds. All the styles and controls, one by one, in Styles and controls.
Want to go further? The Simple | Pro switch at the top opens up the same style from the inside: every effect, one by one. It’s covered in The Pro screen.
Step 4 · Share it
Tap the share button, above the waveform, next to Undo.
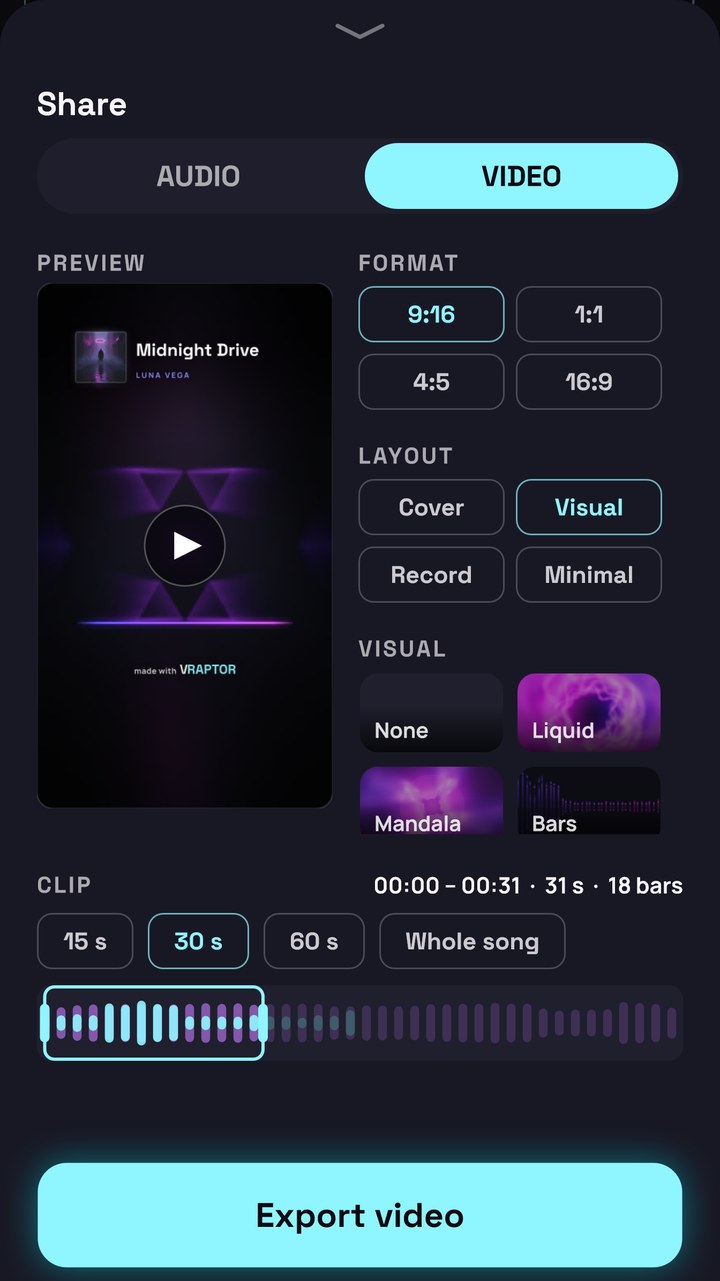
- Video: for TikTok, Reels or Shorts. It has the cover, the title and an animated visual that follows the music. Choose the clip: 15, 30 or 60 seconds, or the Whole song. Drag the window over the song to choose which part goes in the video.
- Audio: M4A (AAC, small enough to send), WAV (lossless, for mixing and mastering) or Stems: the voice, the dry voice and the beat as separate files, to mix in another app.
Tap Export video or Export audio and choose where to send it.
Making songs and sharing them is free. A few things are Premium: videos longer than 30 seconds, removing the watermark, WAV, the separate stems, some styles and some visuals. If your song uses something Premium, VRaptor tells you when you export. More in Export.
Your song is saved in the Library: you can come back to it whenever you like from there, or from Continue Working when you open the app.
Next
→ 2. Recording: headphones, Bluetooth, sync and the microphone level.